3.3. Using VSCode for Remote Development#
For remote development, we recommend using Visual Studio Code (VSCode) with the Remote - SSH extension. This extension allows you to open any folder and file on the FASRC cluster and take full advantage of VSCode’s feature set.
3.3.1. Prerequisites#
You must install VSCode on your local machine and also ensure the Remote - SSH extension is installed.
Note
Please see Install Visual Studio Code extensions for installing the extensions.
3.3.2. Connecting to the FASRC cluster (login node)#
Step 1: The ssh configuration file on your local machine should have an entry for the FASRC cluster.
For mac and linux users, the file is located at ~/.ssh/config. For Windows users, the file is located at C:\Users\<username>\.ssh\config. Add the following entry to the config file:
Host cannon
  HostName holylogin01.rc.fas.harvard.edu
  User <username>
Warning
Please rotate among different login nodes to avoid an unbalanced load on specific nodes. Create multiple connections and change the login node name (e.g., from holylogin01 to holylogin02, holylogin03, or holylogin04) and connect to a different login node every time. For example, define cannon02 connection as,
Host cannon02
  HostName holylogin02.rc.fas.harvard.edu
  User <username>
Please make sure that you use your FASRC username in place of <username>.
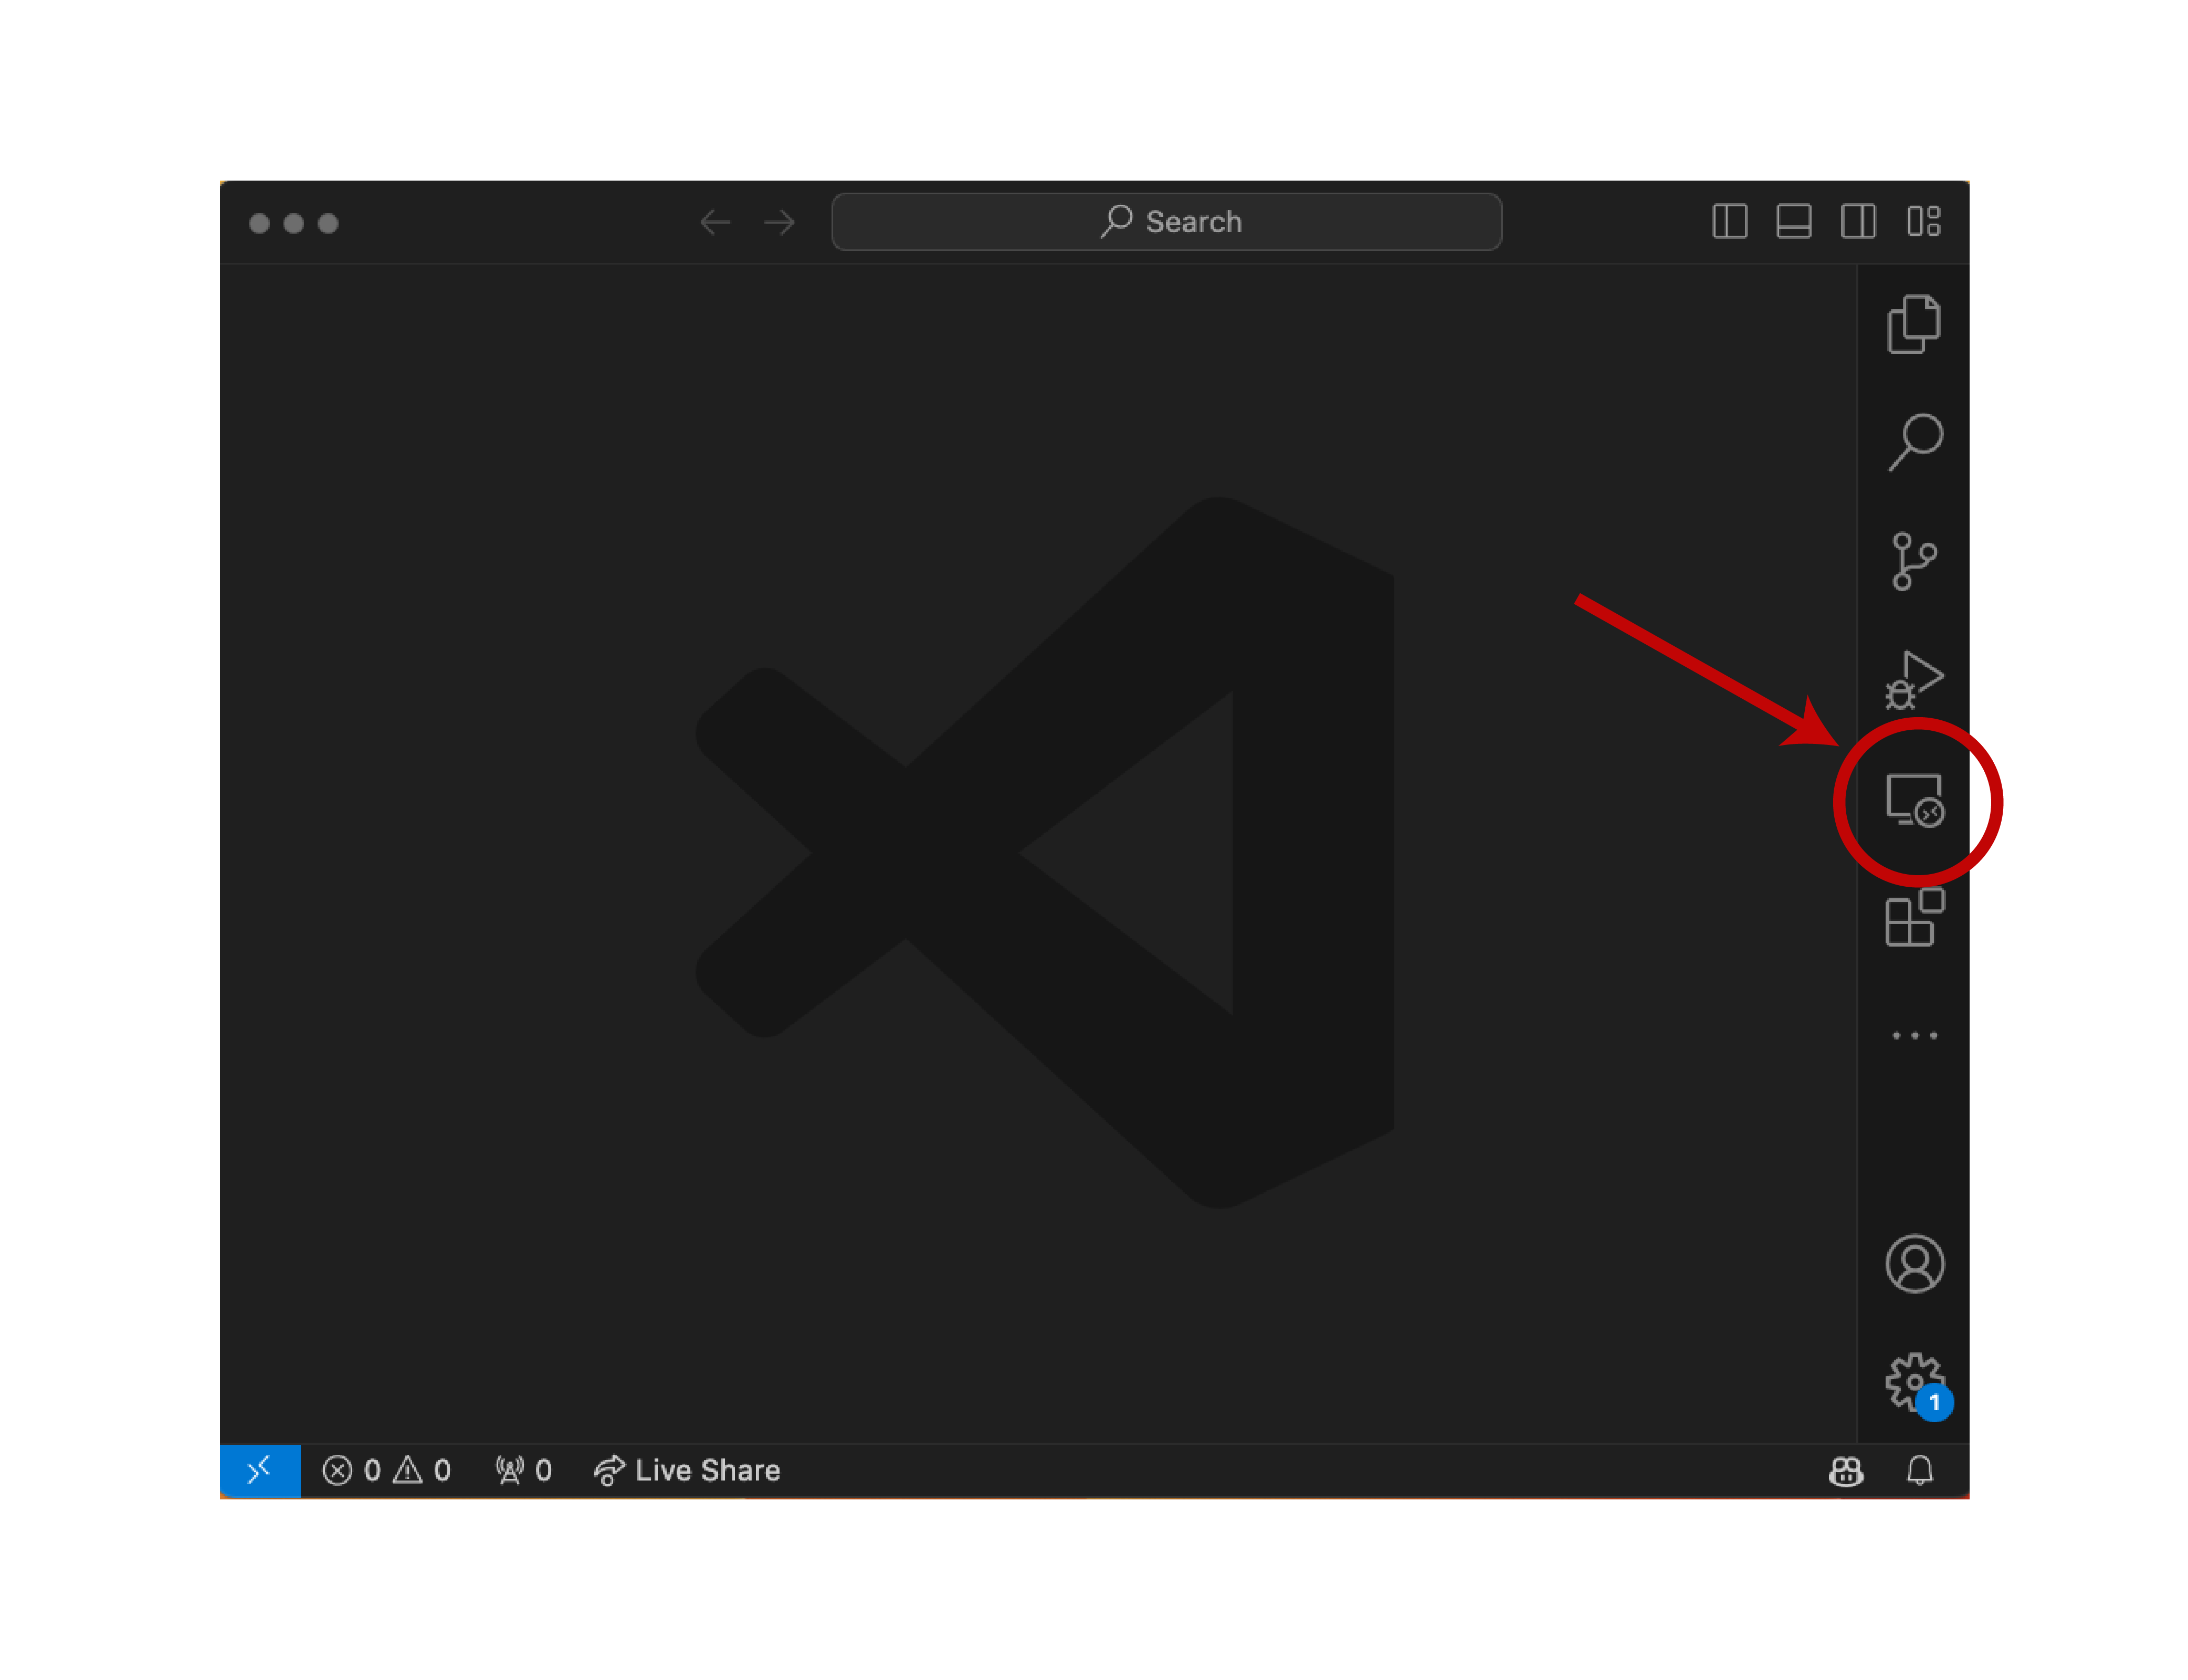
Step 2: Open the VSCode and click on the Remote Explorer icon on the left-hand (or the right-hand) side of the window.
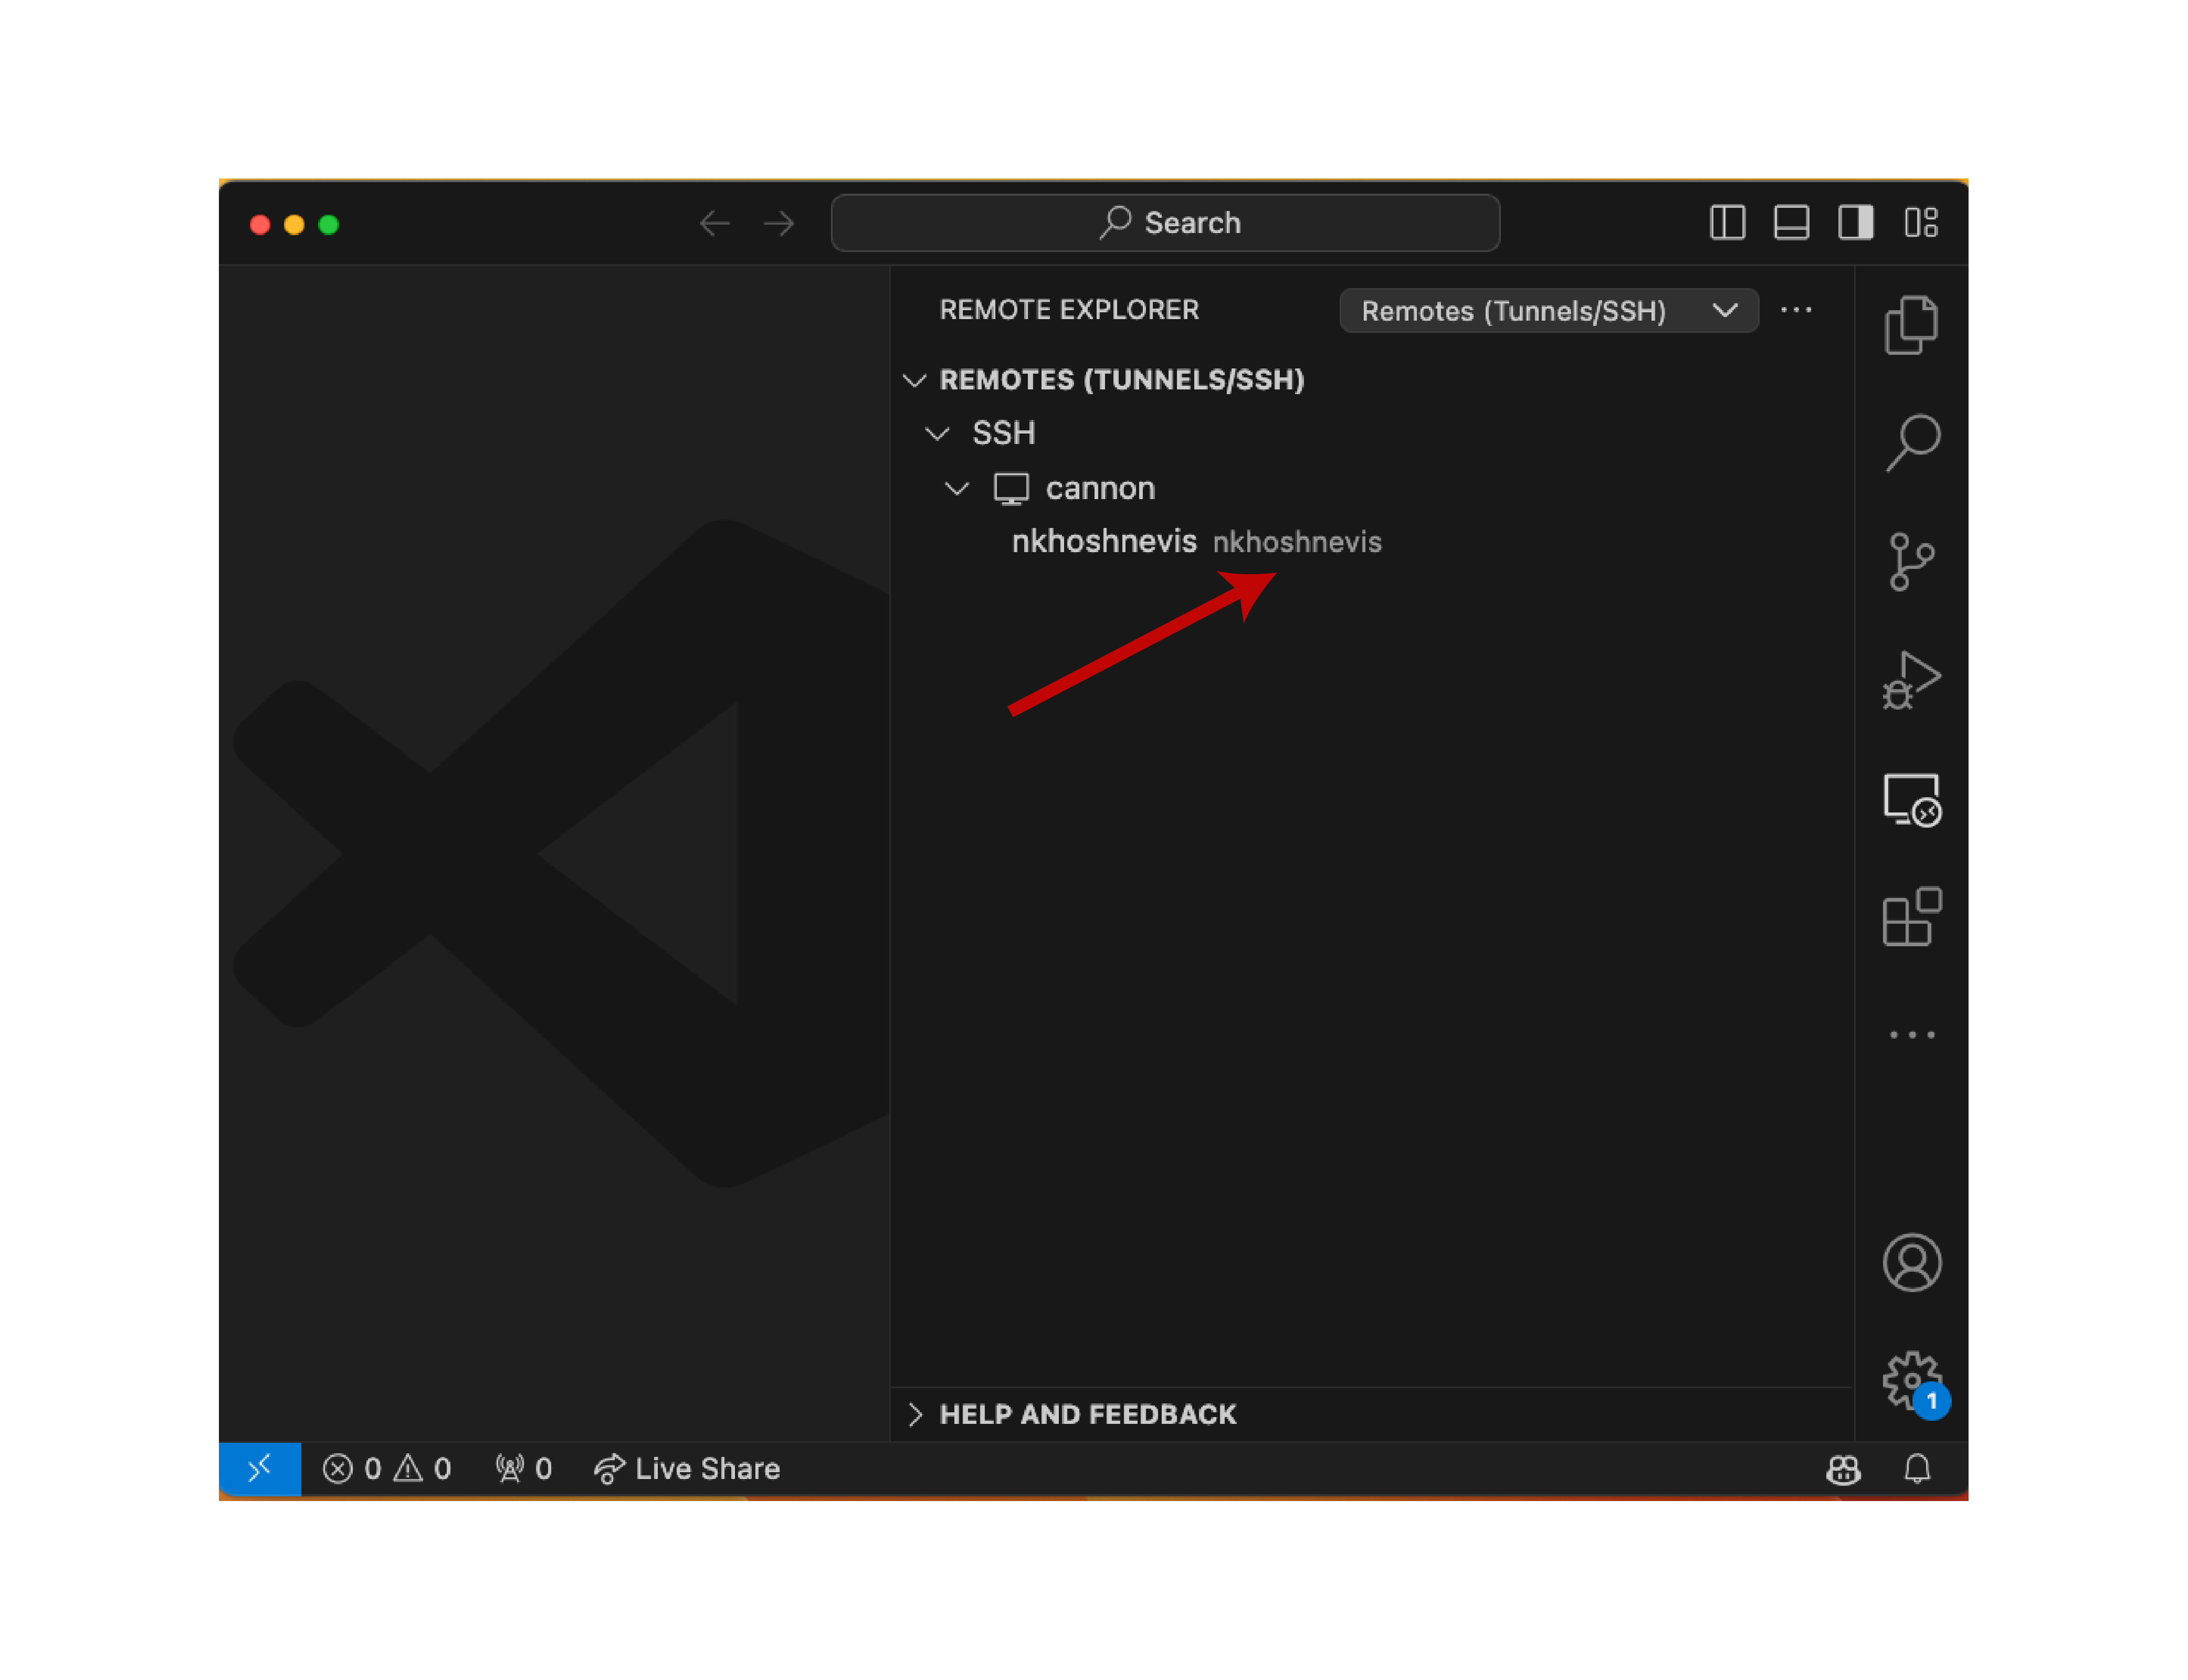
Step 3: Hover the mouse on your username or on
cannonand click on the->button to connect to the FASRC cluster.
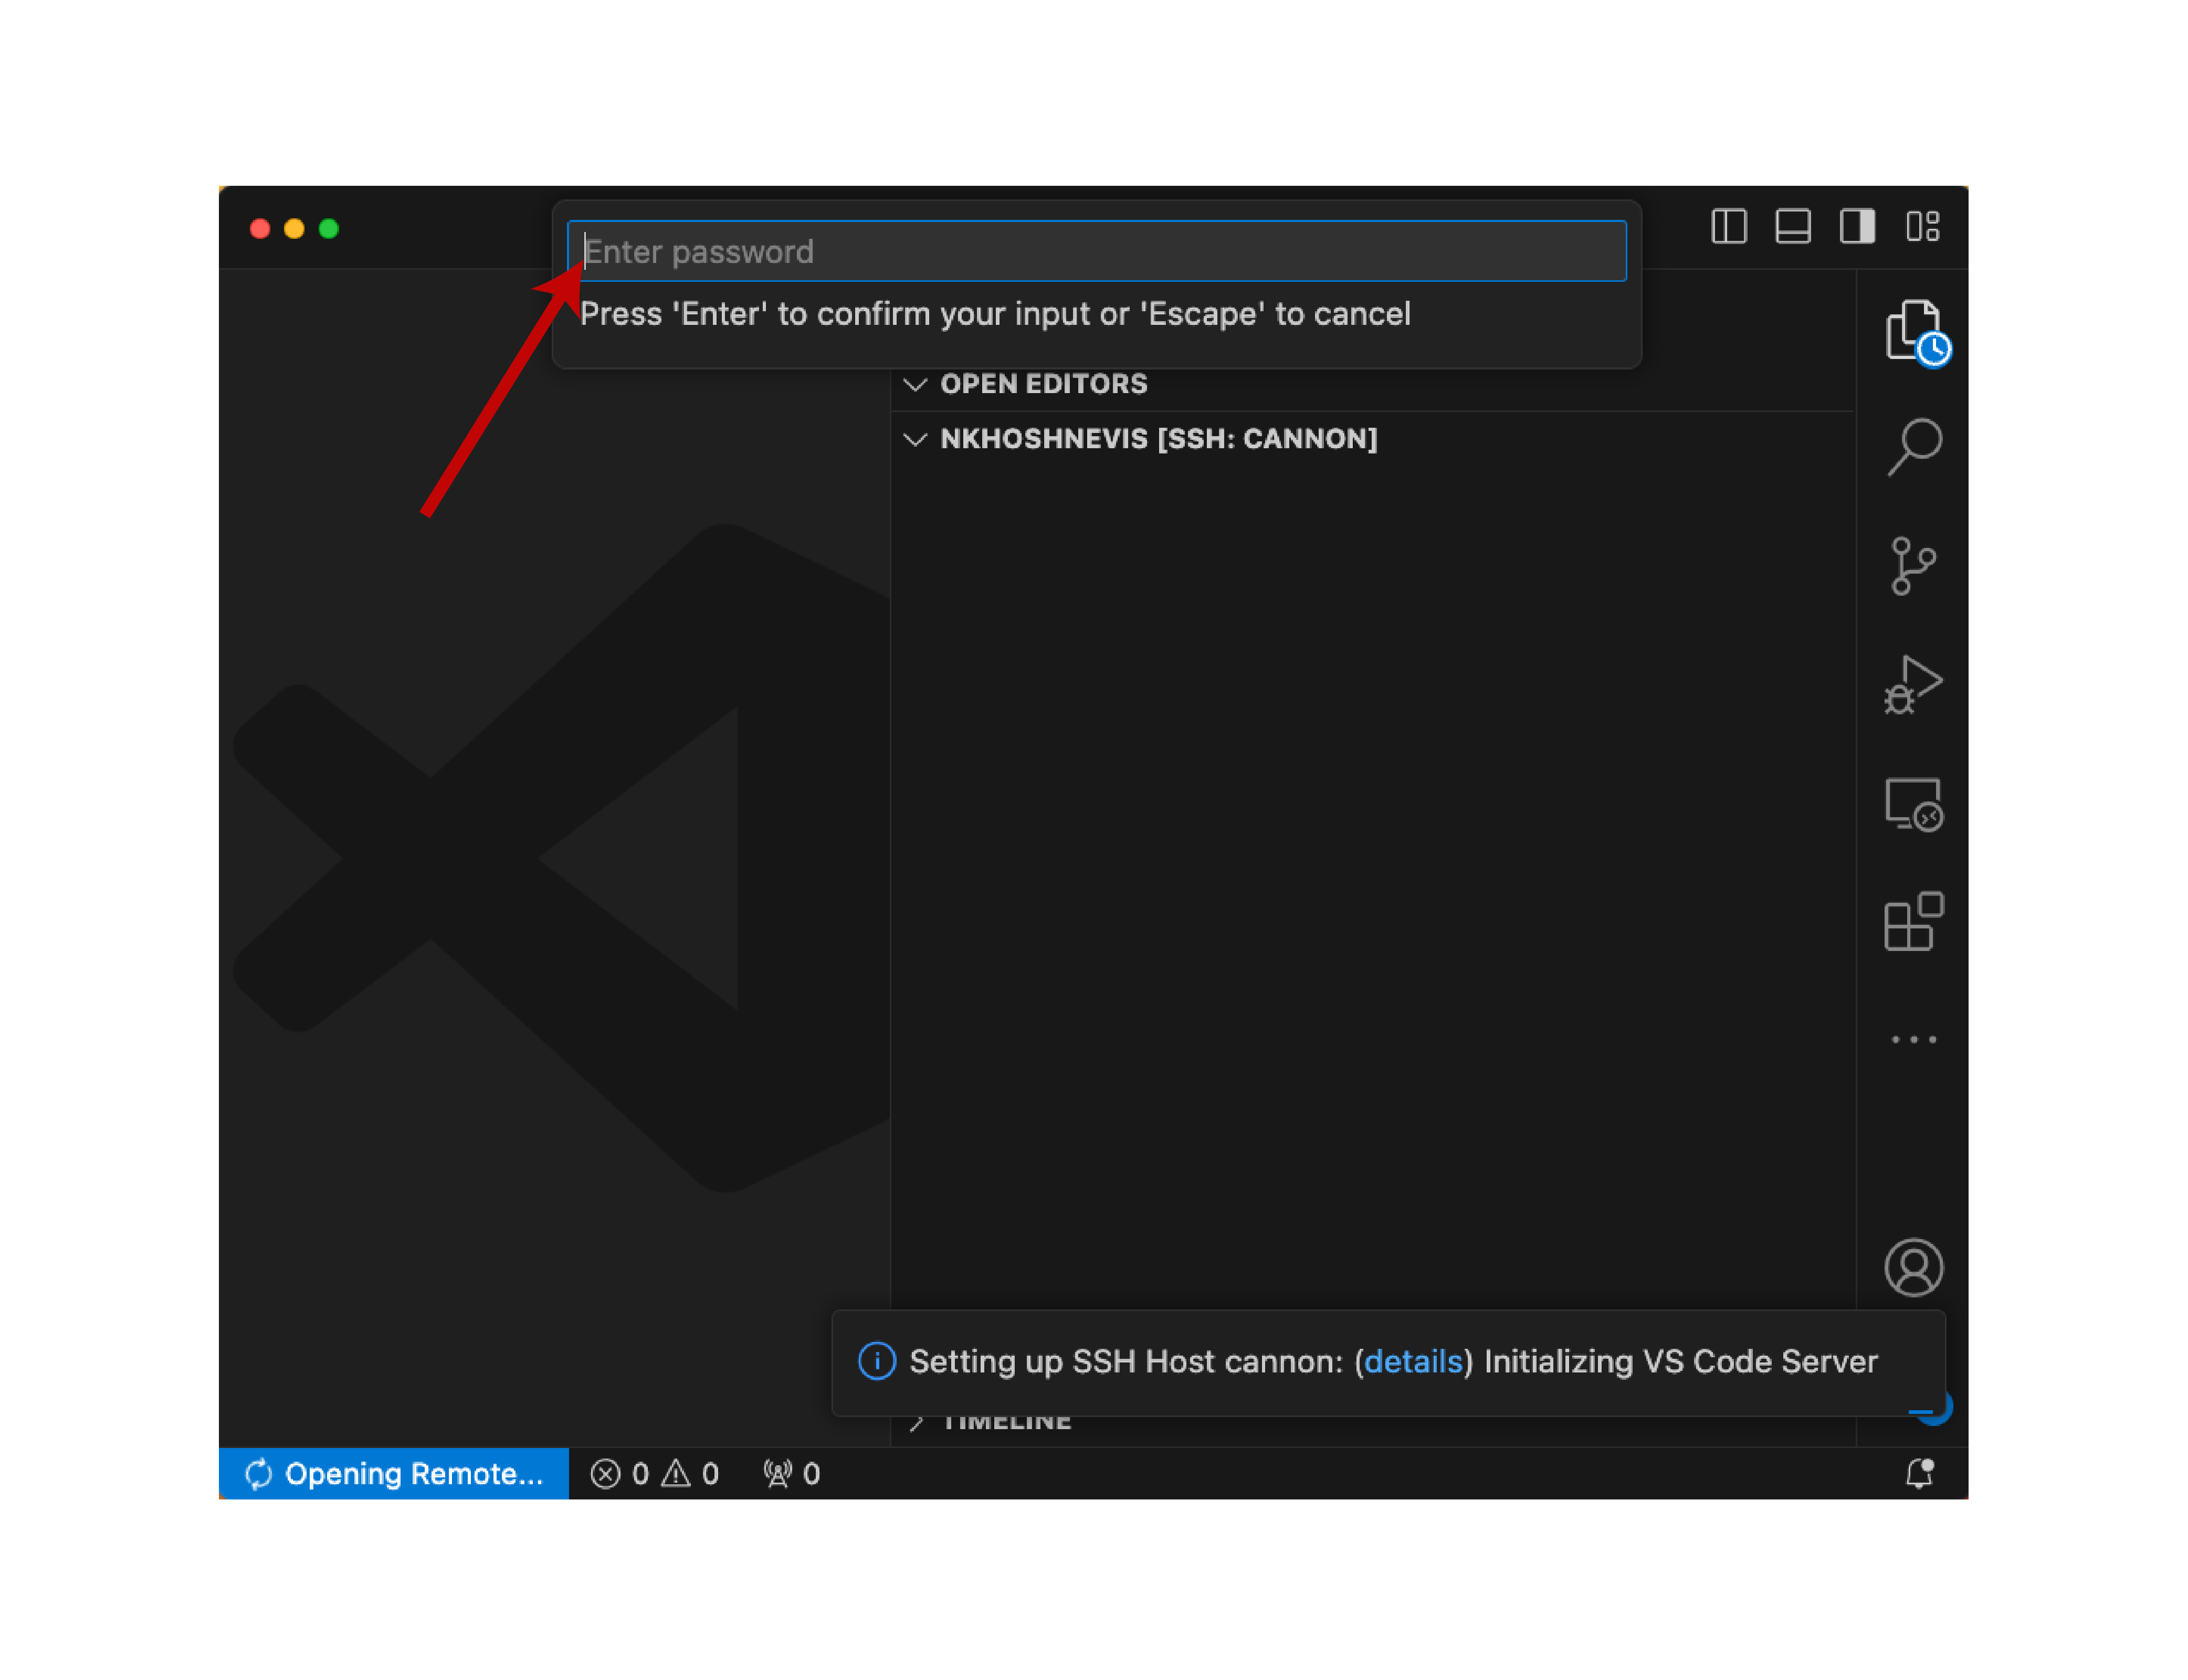
Step 4: Enter your FASRC password (and MFA code) when prompted.
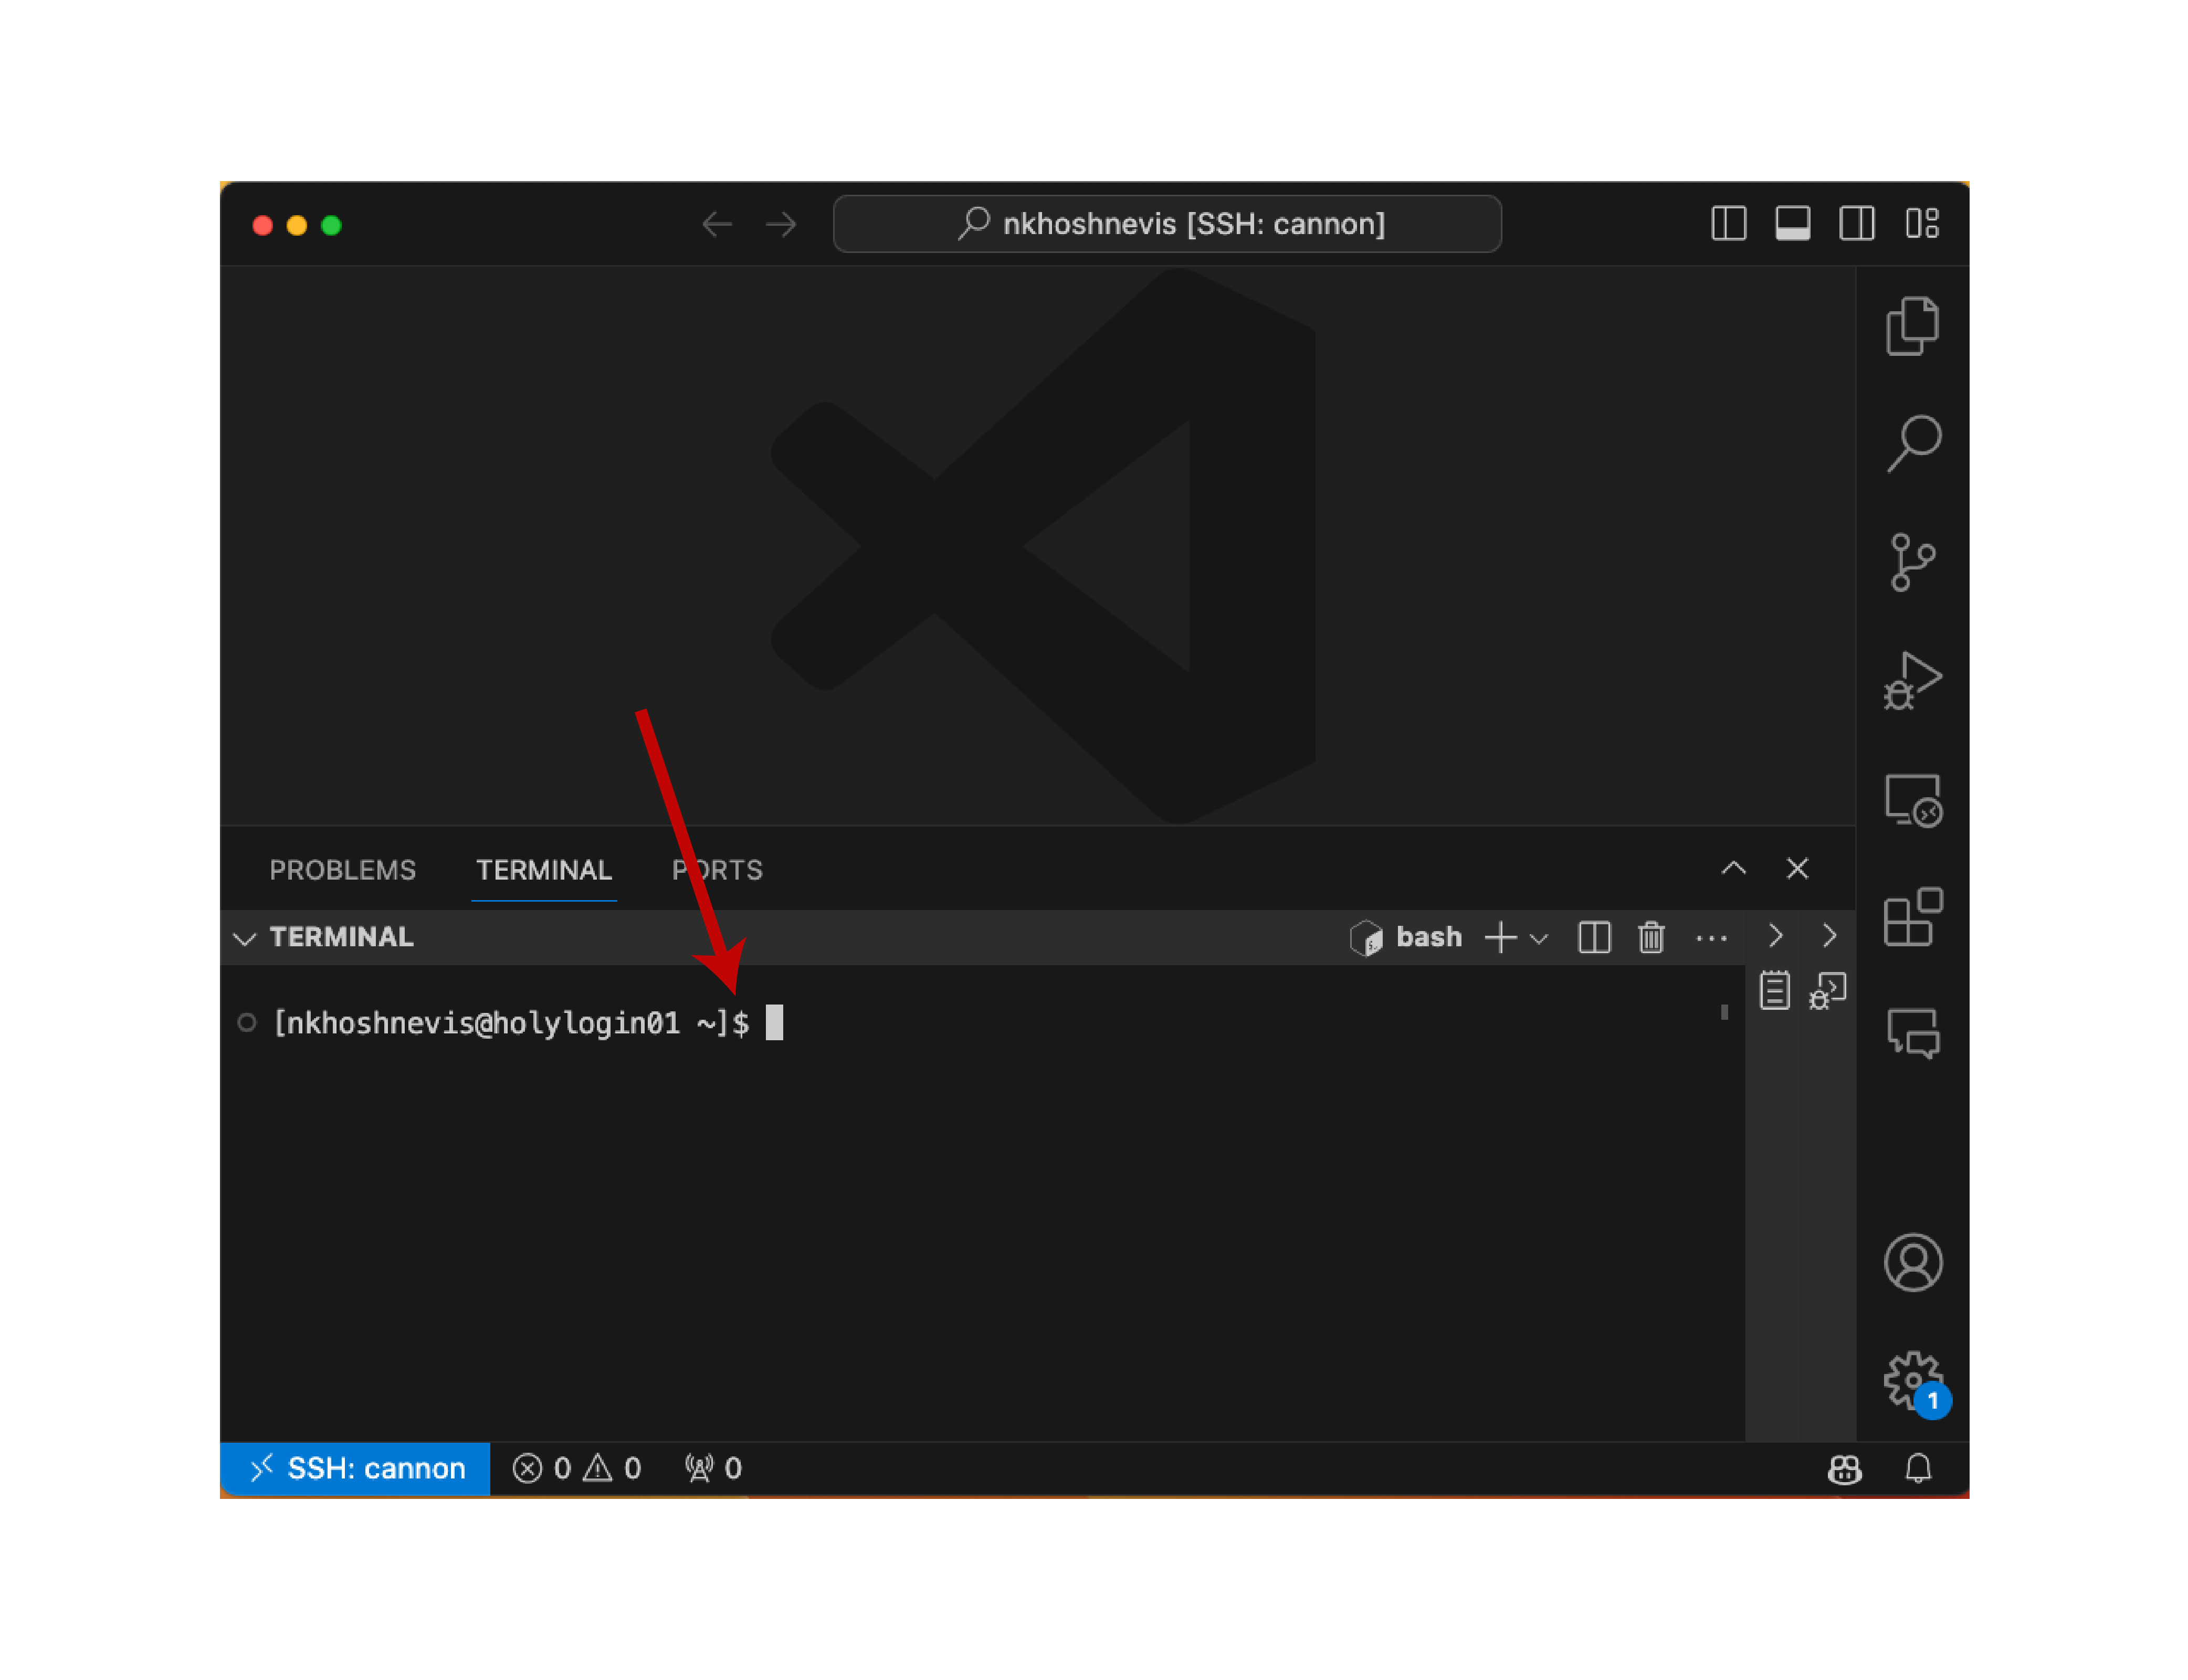
Once connected, you will see the file explorer on the left-hand side of the window. You can now open any folder or file on the FASRC cluster and take full advantage of VSCode’s feature set.
Note
Please do not run any computationally intensive tasks on the login node. Use the login node only for editing files and submitting jobs to the compute nodes.
You can use the terminal in VSCode to run SLURM commands and submit jobs to the compute nodes. Open the terminal by clicking on Terminal -> New Terminal in the top menu.
3.3.3. Connecting to the FASRC cluster (Compute node)#
Connecting to the compute nodes requries two additional configurations:
Add the compute node configuration to the ssh configuration file on your local machine.
Host cannon
  HostName holylogin01.rc.fas.harvard.edu
  User <username>
  ControlMaster auto
  ControlPath ~/.ssh/%r@%h:%p

Host holy*
    HostName %h
    User <username>
    ProxyJump cannon
Warning
Please rotate among different login nodes to avoid an unbalanced load on specific nodes. Create multiple connections and change the login node name (e.g., from holylogin01 to holylogin02, holylogin03, or holylogin04) and connect to a different login node every time.
Generate a public and private key on your local machine and submit the public key to the FASRC cluster.
Go to the ~/.ssh directory on your local machine and see if you have a file named id_rsa.pub. If you don’t have the file, you need to generate the keys using the following command:
ssh-keygen
Once you have the id_rsa.pub file, submit the public key to the FASRC cluster using the following command:
ssh-copy-id -i ~/.ssh/id_rsa.pub <username>@login.rc.fas.harvard.edu
It will prompt you to enter your FASRC password. Once you enter the password, the public key will be added to the ~/.ssh/authorized_keys file on the FASRC cluster.
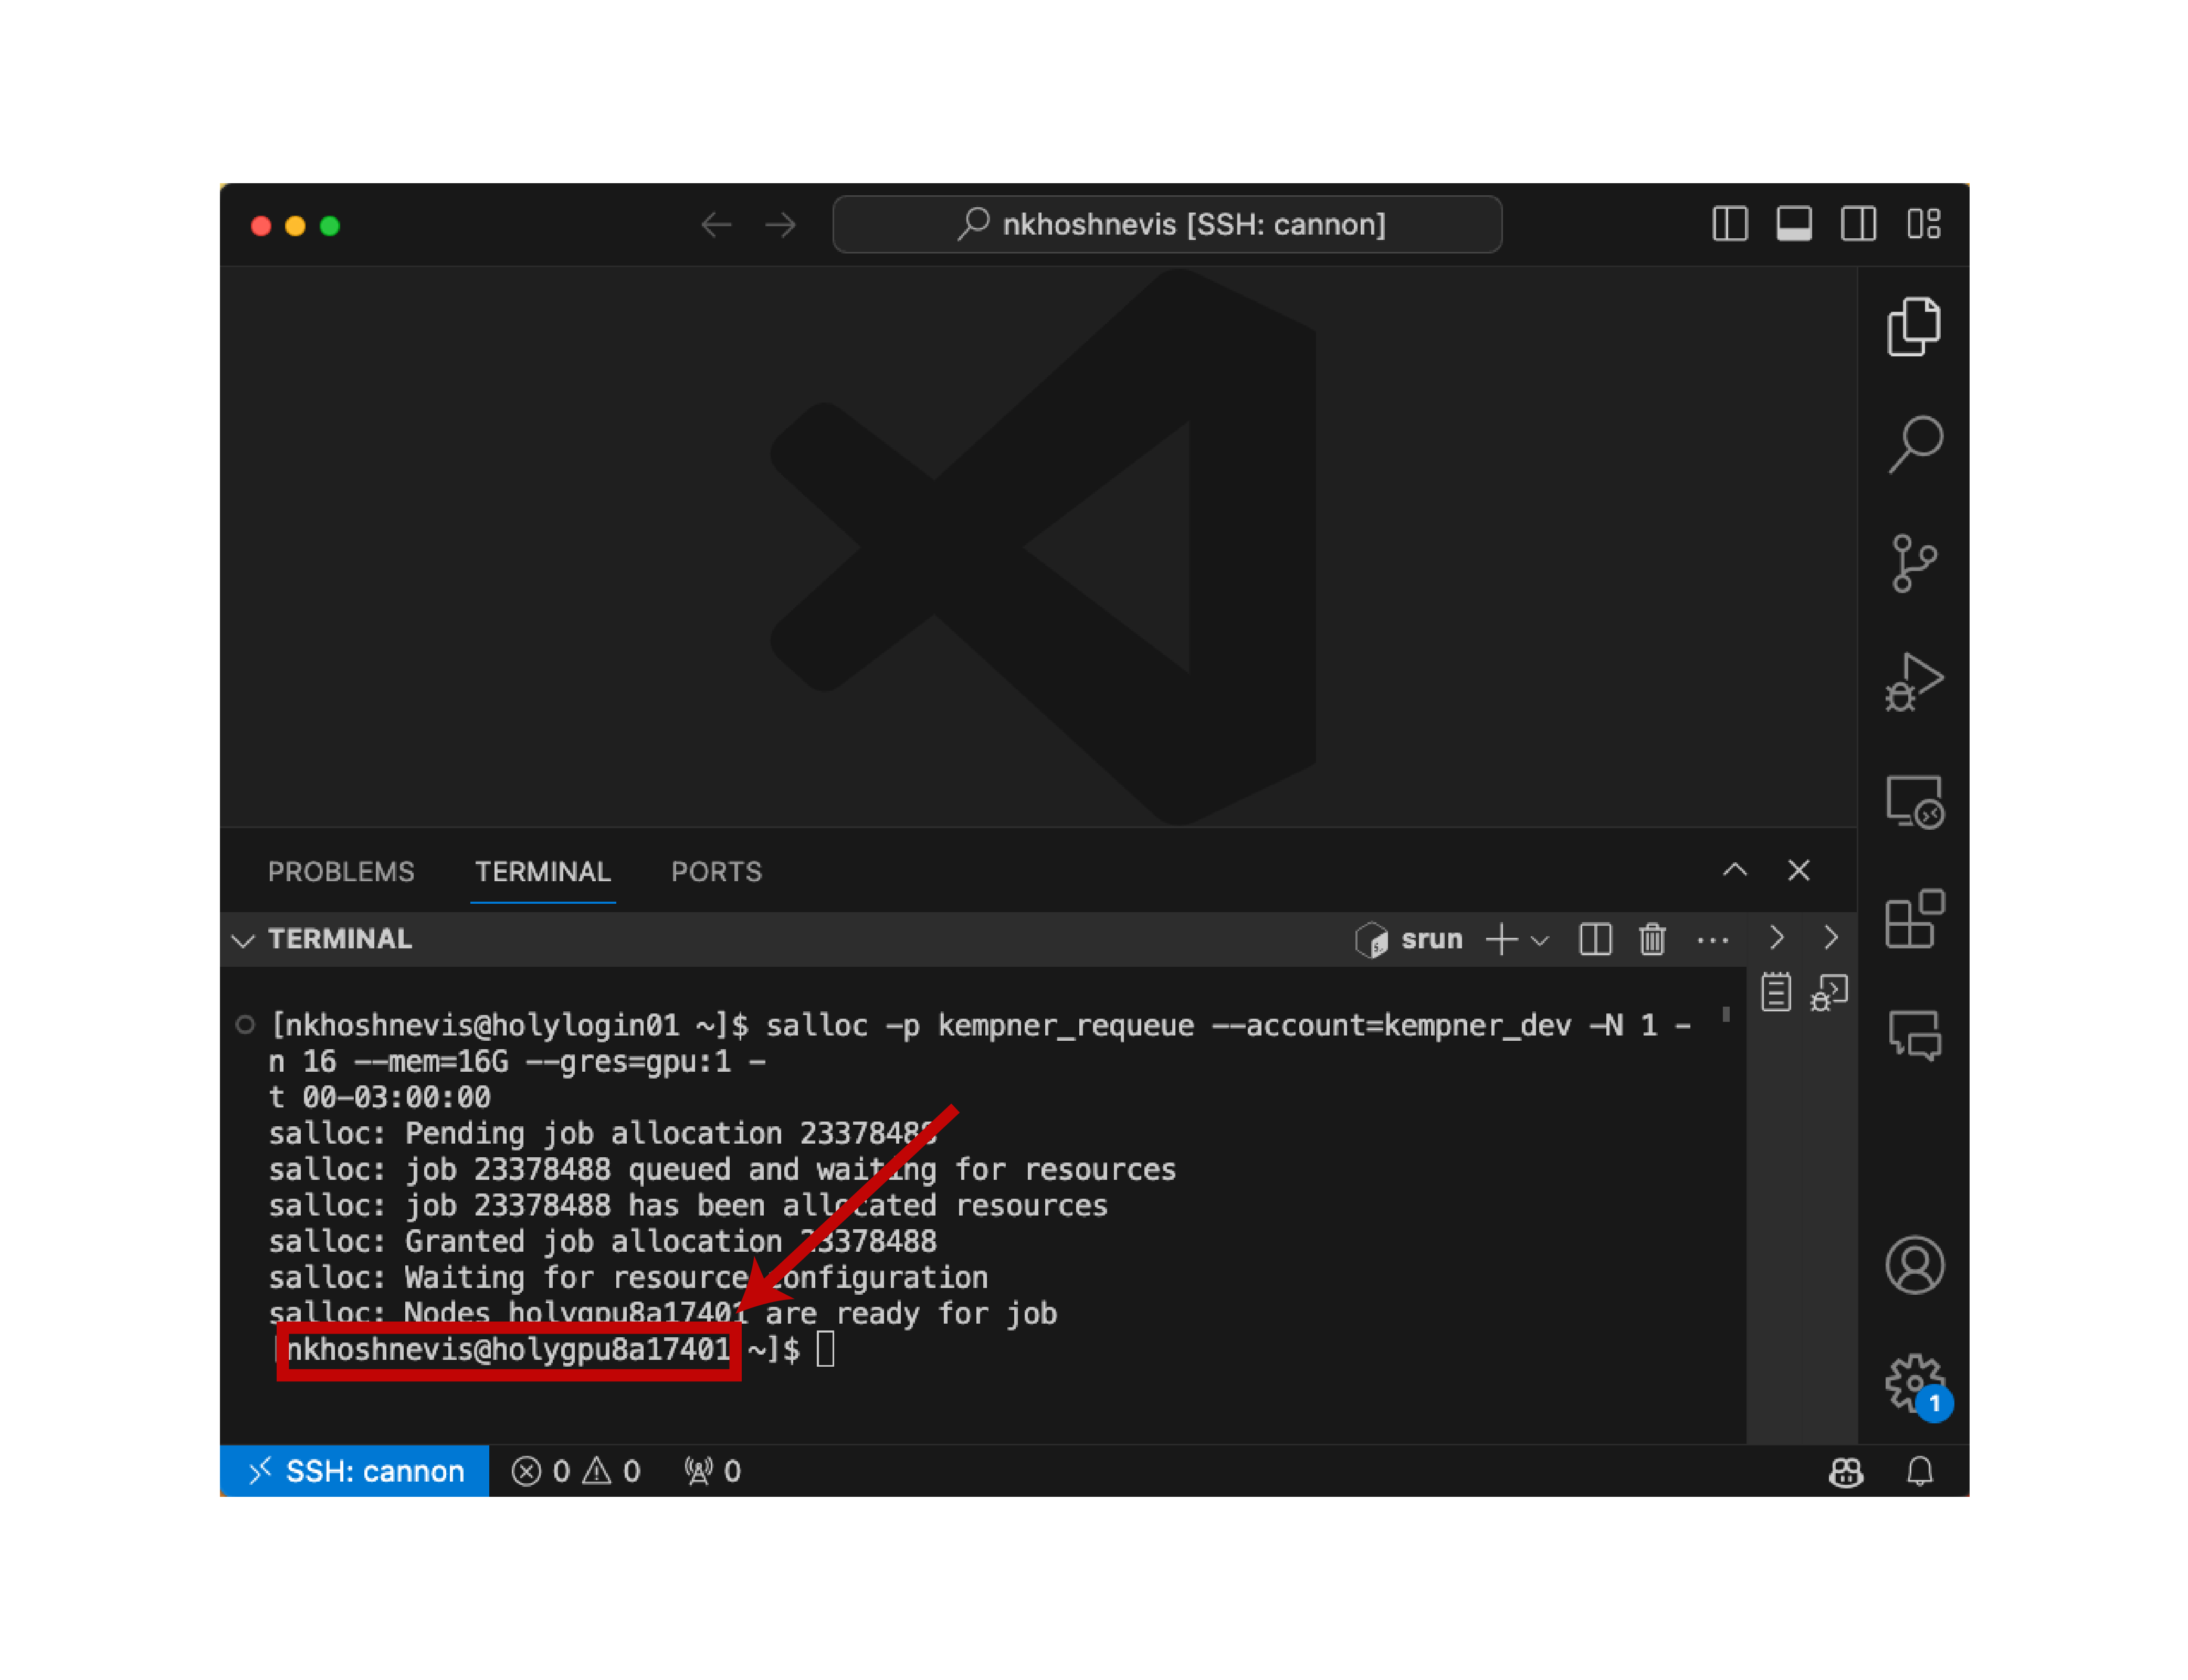
After completing the above steps, you can connect to the compute nodes. First connect to the login node and allocate an interactive session. For example:
salloc --partition=kempner_requeue --account=kempner_dev --ntasks=1 --cpus-per-task=16 --mem=16G --gres=gpu:1 --time=00-03:00:00
This will allocate an interactive session on the kempner_requeue partition with 16 cores, 16GB of memory, and 1 GPU for 3 hours. Then node name is displayed int the terminal.
Tip
You can also use the squeue -u <username> command to see the list of your running jobs and the nodes they are running on.
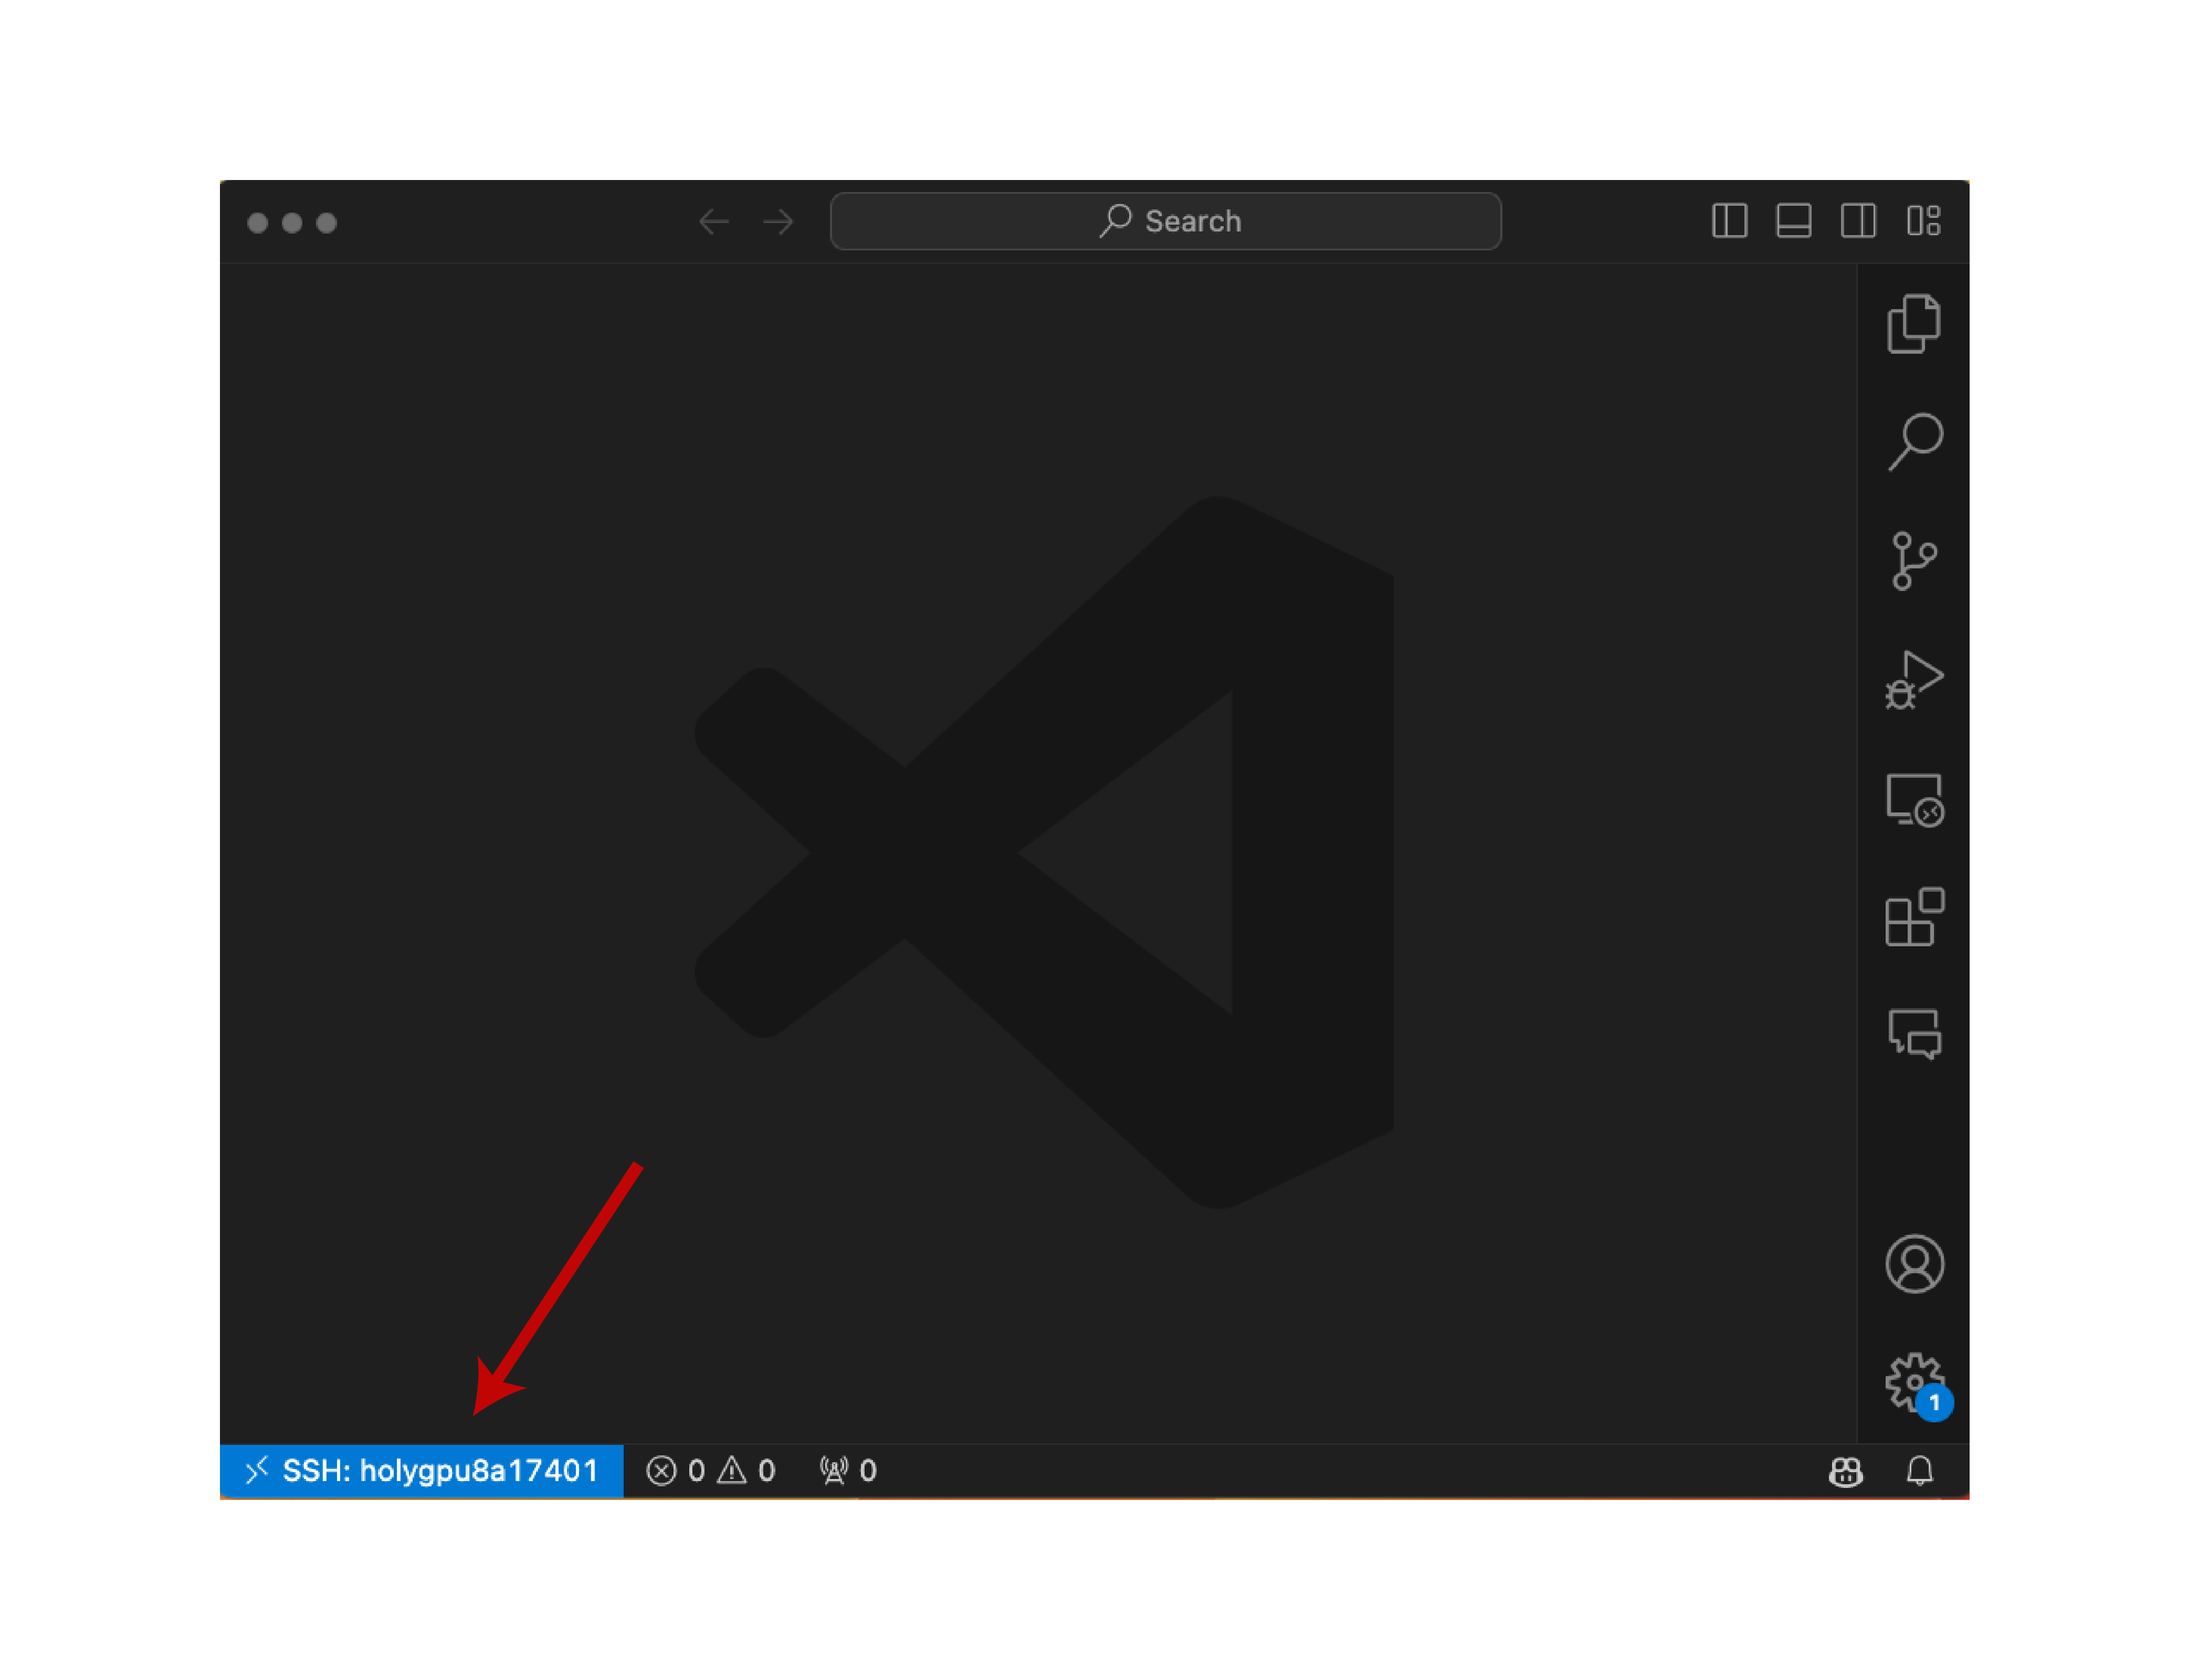
Once you have the node name, go to the search bar of the VScode and type >Remote-SSH: Connect to Host... and then in the prompt, put <username>@<node_name> and press enter.
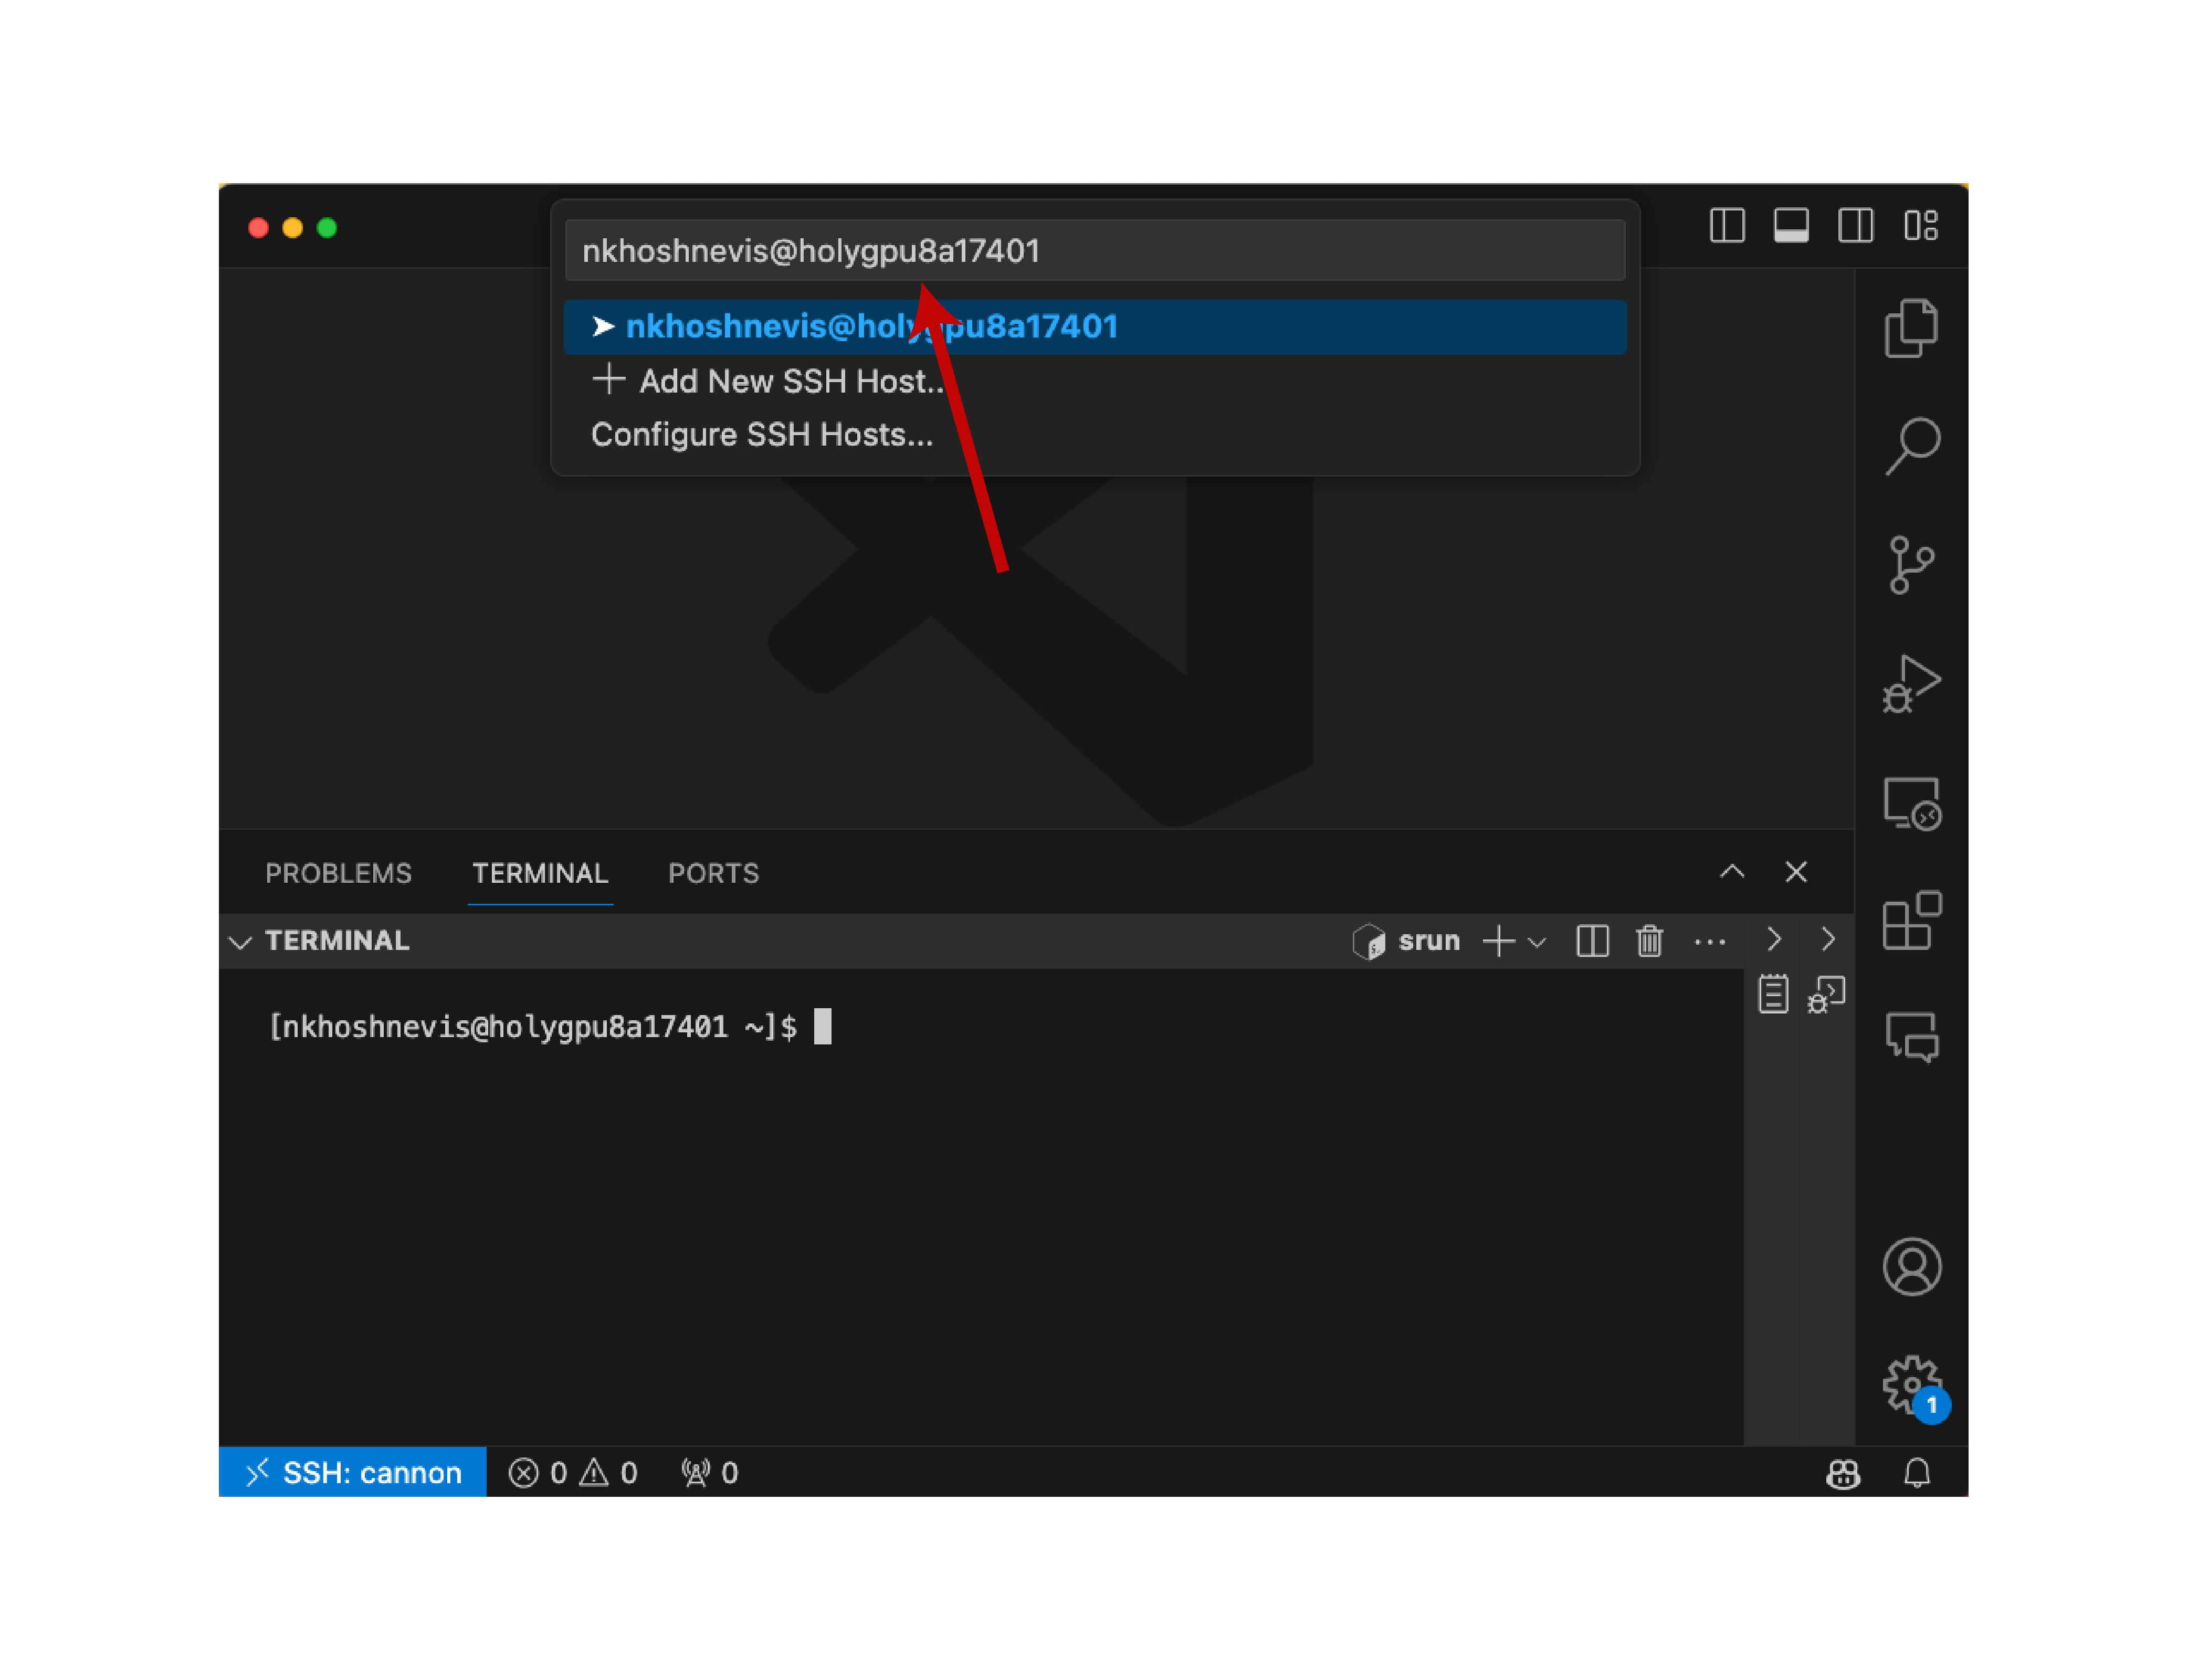
This will open a new window on the compute node. You can now use it to run your jobs interactively.
3.3.4. Using Jupyter notebooks within VSCode#
You can open, edit, and run Jupyter notebooks within VSCode. To do so, you need to first install the Jupyter extension.
The interface for notebooks within VSCode is similar to other methods of accessing them - there are tools for running individual cells, all cells, clearing all outputs, etc. See the VSCode jupyter notebook documention for a detailed overview of these options.
If you follow the instructions above, you will be able to open and run jupyter notebooks within an interactive session on the cluster. Open the notebook within VSCode and click on Select Kernel (in the top right corner):
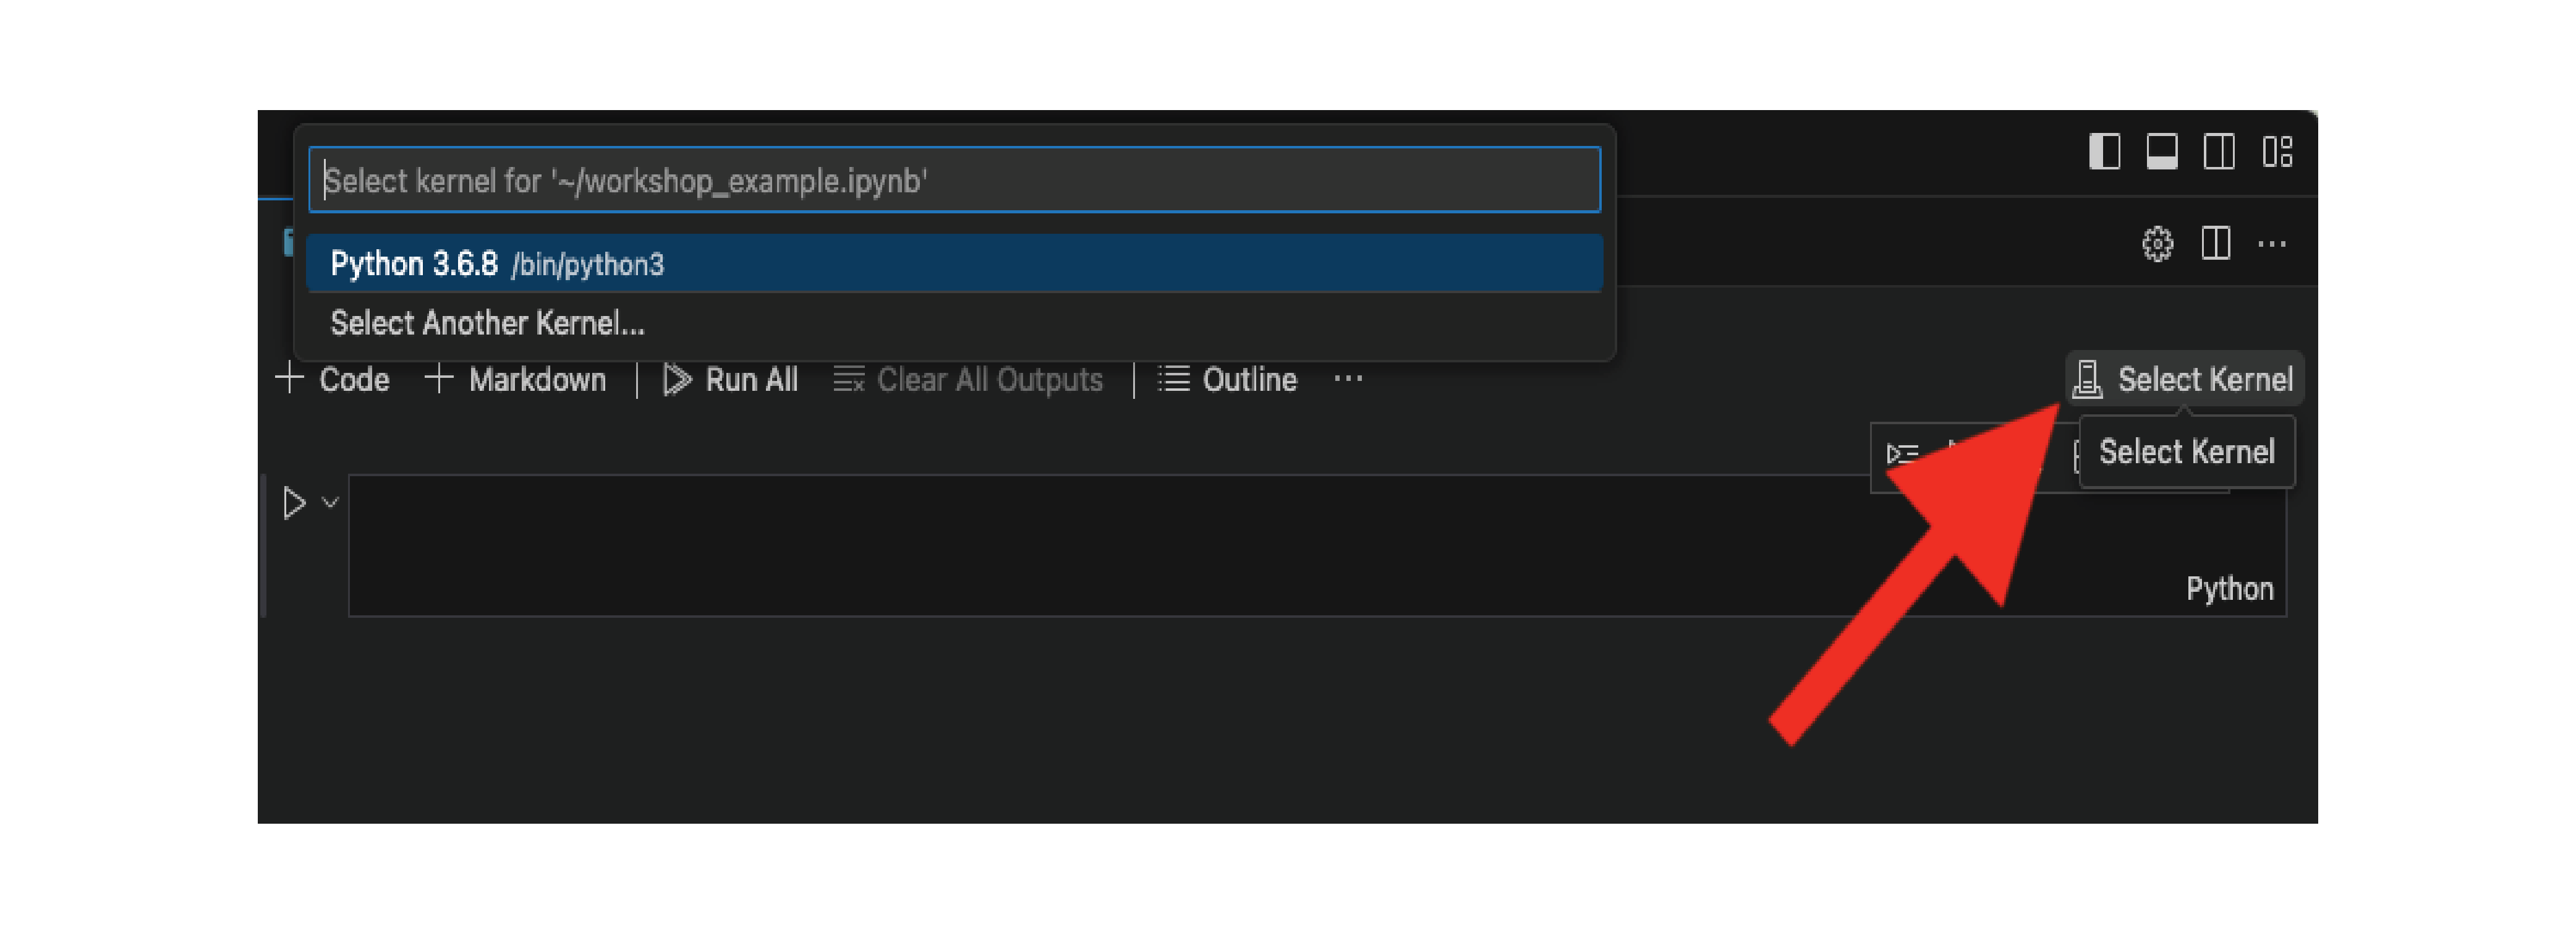
If you click Select Another Kernel and then Python environments, you should see a list of possible kernels, including any user-defined conda environments (if you installed ipykernel within them):
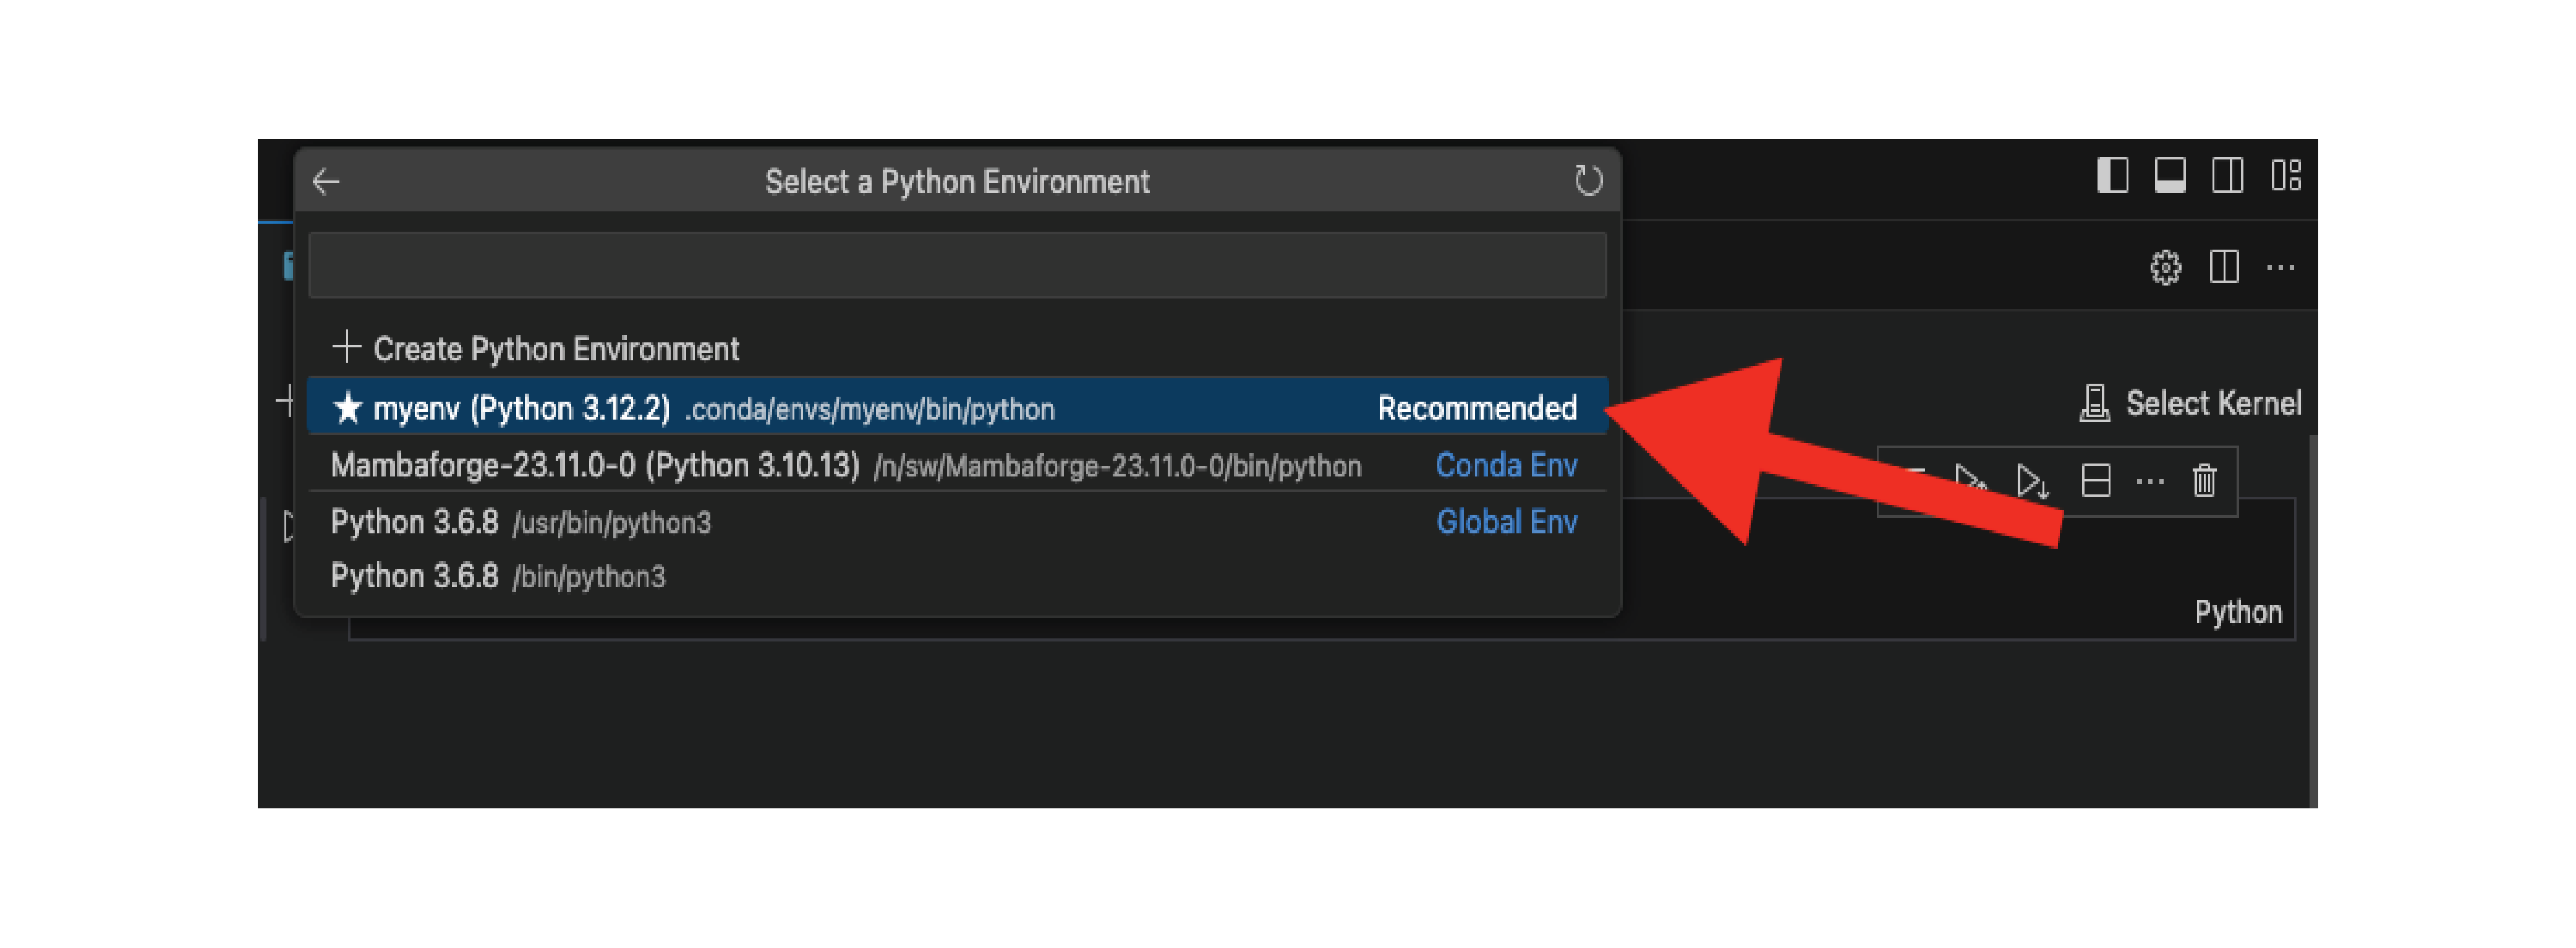
You can click on your preferred environment to use it within the jupyter notebook.
If you recently created the conda environment, you may need to reload before it shows up. To do this, open the command palette using Ctrl + Shift + P (Windows)/Shift + Command + P (Mac) and type and select Reload Window.